MDPC-X
Crimping Tool CTX3
Crimping Tool CTX3
Couldn't load pickup availability
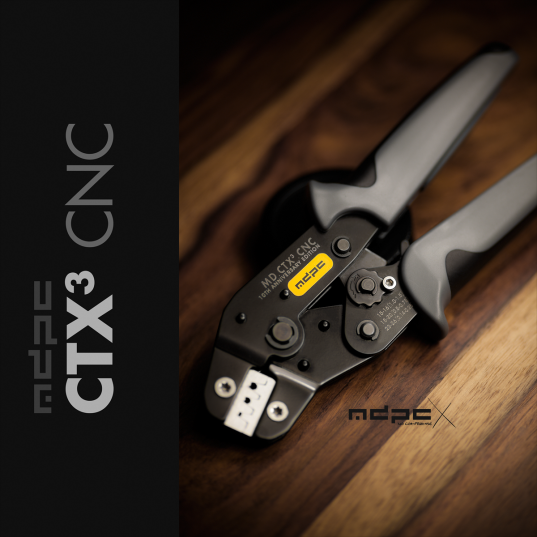
The MDPC "10th Anniversary Edition" crimping tool MD-CTX3 replaces the legendary CT1 model, which earned the reputation of being the reference for the last 7 years.
Combining the best of the best to make a universal crimping tool in a class of its own:
1. Crimping result quality of the MD-CTX3 crimping tool:
- 5-axis CNC shaping of the essential structures, made in Germany, to achieve the highest standards in crimp terminal shaping over all 3-axis (!) of the crimp terminal - based on the official MLX guidelines.
- Successful pull force testing for all 3 wire sizes in all 3 slots of the crimping tool - based on the official MLX guidelines.
- The successful combination of the first 2 aspects is where existing tools had to compromise. The MD-CTX3 meets both aspects.
- This crimping tool is specifically made for the following wire sizes: AWG15-AWG16 (EU 1.50mm², EU 1,00mm²), AWG18-AWG20 (EU 0,75mm², EU 0.50mm²), AWG26 (EU 0,25mm², EU 0,14mm²).
- The following crimp terminals can be crimped perfectly (!): Open barrel type ATX (Mini-Fit-Jr and similar) AWG16 and AWG18-20 crimp terminals, fan crimp terminals (and similar), so called internal 2.54 grid DuPont, i.e. internal USB, internal audio, frontpanel etc.) crimp terminals and the so called "Molex" terminals (5 1/4" power, deprecated at MOLEX). You can basically crimp every open-barrell type crimp terminal with this crimping tool, as long as it fits into the size range.
2. Build quality of the MD-CTX3 crimping tool:
- The MD-CTX3 crimping tool is the result of 6 involved companies in Taiwan and Germany: 3 different companies in Taiwan are responsible for the base, 3 companies in Germany are responsible for the end product.
- The final design of the MD-CTX3 tool has no weaknesses in any detail and is 100% unique in total, from overall design to finest CNC details.
- The custom handles are not only a beauty to look at; they also distribute the forces more evenly to your hands than our CT1 handles.
- The steel jaws of the crimping tool are additionally hardened and cannot be damaged by regular crimping terminals and wires.
- Countersunk head construction (as on the CT1) does not block the view onto the terminals. Highest quality German made hardened stainless steel screws are used everywhere in the crimping tool, so there will be no rusting, degradation or stability issues over the lifetime of your MD-CTX3 crimping tool.
Guaranteed perfection in crimp terminal shaping for all major wire sizes, while fulfilling all standardized pull force tests, this 100% unique MD-CTX3 crimping tool will last for a lifetime, because the final construction eliminates all potential weaknesses a crimping tool could have. This is the last crimping tool you will likely ever buy in your life: Good for you, bad for us at this price.
Crimping guide and tutorial for the MDPC-X crimping tool:
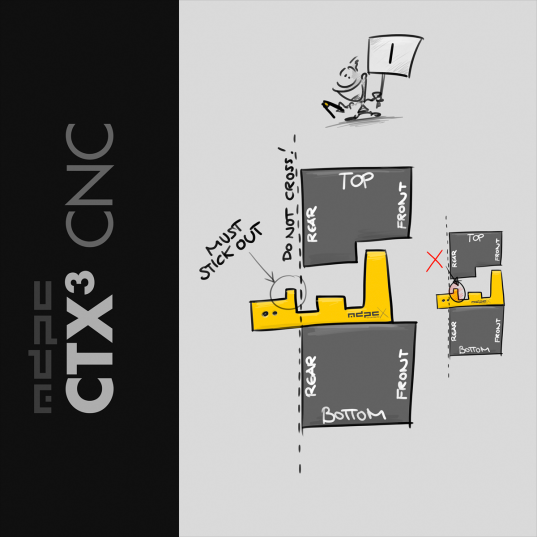
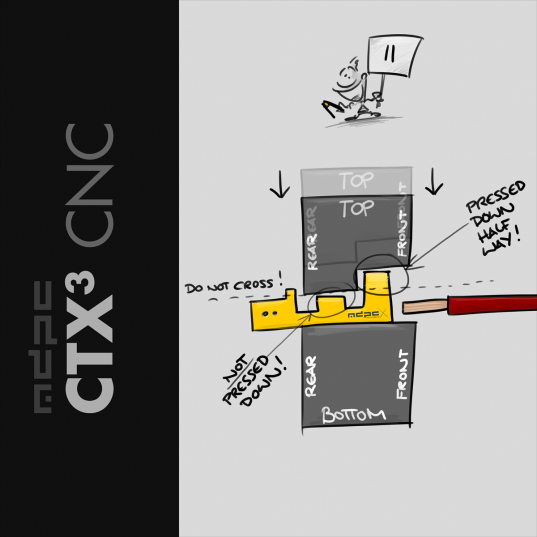
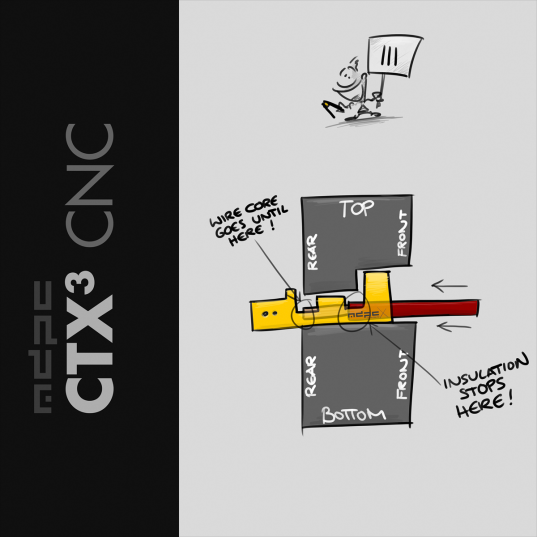
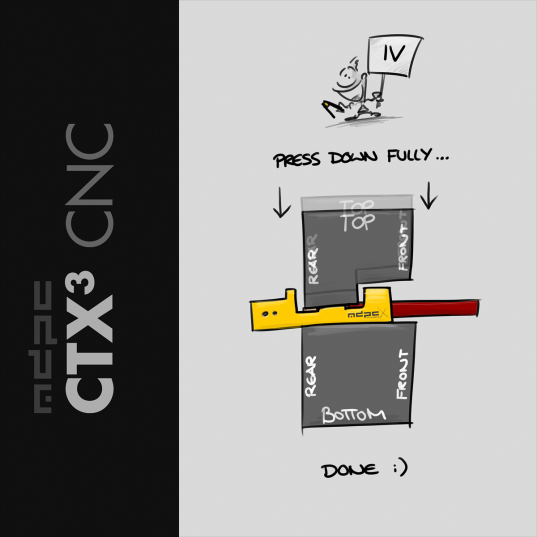
Please take a look at the image gallery of this crimping tool. It gives you a full understanding about the procedures and important details of crimp terminal positioning.
- You "open" the crimping tool by "closing" it. Just press the handles together and the ratchet mechanism will release the lock.
- Place the crimp terminal into one of the 3 slots with the matching size for terminal and wire. The front of the crimp terminal must stick out of the jaws-rear far enough (the images explain it best). This is the most important aspect!
- Close the tool a little bit until it squeezes down the rear-wings of the crimp terminal (the so called "insulation holders").
- Now push the uninsulated wire into the rear of the crimp terminal until the insulation stops at the narrow part in the middle of the crimp terminal (the so called "wire core holder"). The images show exactly what is meant. Insulation holder of the terminal is fully over the insulation, wire holder is completely over the uninsulated wire core.
- Now fully close the tool and it will "open" again when fully squeezed together. Done!
- You can always "pre-open" the tool by pushing the small lever (on the inside of the bottom handle) towards the front of the tool, while slightly pressing the handles together. If you experience that the front of a crimp terminal turns upwards or downwards, just place a finger underneath the crimp terminal front, which sticks out of the tool.
- Enjoy the unlimited power of creating your own cables!
